Jiangmen Rene Battery Technology Co., Ltd.

From Installation to Maintenance: Your Complete Guide to 12V 90AH Solar Cells
2025-09-28
From Installation to Maintenance: Your Complete Guide to 12V 90AH Solar Cells Table of Contents Understanding Solar Cells: How 12V 90AH Works Essential Components Required for Installation Pre-Installation Considerations: What You Need to Know Step-by-Step Installation Guide for 12V 90AH Solar Cells Connecting Solar Cells to Your Power System Testing Your Solar Power Syste
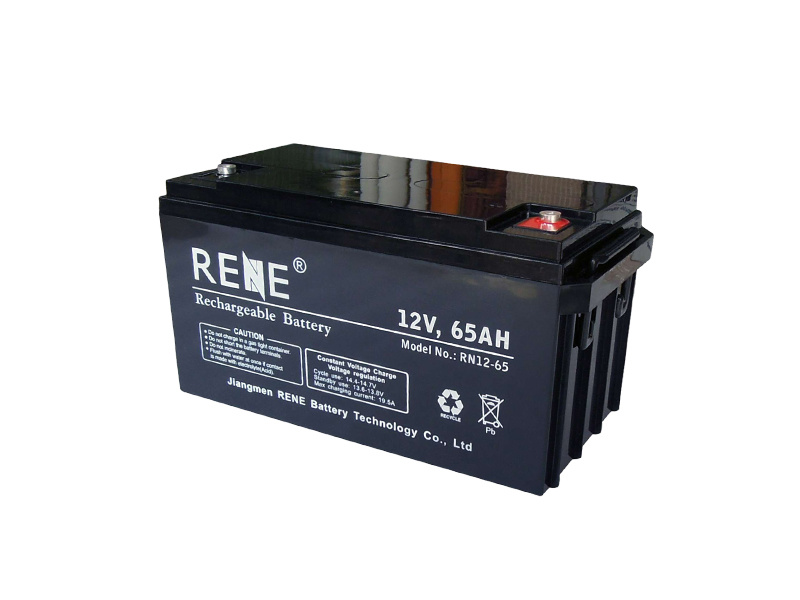
From Installation to Maintenance: Your Complete Guide to 12V 90AH Solar Cells
Table of Contents
- Understanding Solar Cells: How 12V 90AH Works
- Essential Components Required for Installation
- Pre-Installation Considerations: What You Need to Know
- Step-by-Step Installation Guide for 12V 90AH Solar Cells
- Connecting Solar Cells to Your Power System
- Testing Your Solar Power System: Ensuring Optimal Performance
- Maintenance Tips for Longevity and Efficiency
- Troubleshooting Common Issues with 12V 90AH Solar Cells
- Frequently Asked Questions
Understanding Solar Cells: How 12V 90AH Works
The **12V 90AH solar cell** is a crucial component of renewable energy systems, especially for those seeking reliable power off-grid. This system converts sunlight into electricity, which can then be utilized to charge batteries, power appliances, or run equipment. Understanding the basic functionality of solar cells is essential for anyone looking to invest in solar technology.
Solar cells operate on the principle of the **photovoltaic effect**, where sunlight excites electrons in the solar panel, generating a flow of electricity. The **90AH** rating indicates the capacity of the battery to store energy, making it an excellent choice for applications requiring consistent power supply.
Essential Components Required for Installation
To successfully install a **12V 90AH solar cell**, you will need several key components:
- Solar Panels: The solar cells themselves, which capture sunlight.
- Charge Controller: Regulates voltage and current coming from the solar panels to the batteries.
- Batteries: 12V batteries for energy storage, such as AGM or lithium-ion.
- Inverter: Converts DC power stored in batteries to AC power for home use.
- Wiring and Connectors: Essential for connecting all components securely.
- Mounting Hardware: For securing the solar panels in place.
Choosing the Right Solar Panels
When selecting **solar panels**, consider their efficiency, durability, and warranty. Higher efficiency panels will convert more sunlight into usable electricity, while durable panels will withstand environmental conditions, prolonging their lifespan.
Pre-Installation Considerations: What You Need to Know
Before jumping into the installation, several factors must be considered to ensure optimal performance:
- Location: Identify the best location for your solar panels, ideally where they can receive maximum sunlight exposure throughout the day.
- Angle and Orientation: The angle at which the panels are mounted can significantly affect their efficiency. Generally, a tilt equal to your latitude is recommended.
- Energy Needs Assessment: Evaluate your energy consumption to determine how many **12V 90AH solar cells** you will need.
Step-by-Step Installation Guide for 12V 90AH Solar Cells
Follow these steps to install your solar cells effectively:
Step 1: Gather Tools and Materials
Collect all the necessary tools, including a drill, screwdriver, wire cutters, and safety gloves. Ensure all materials are on hand before starting the installation.
Step 2: Install Mounting Brackets
Secure the mounting brackets to your chosen location, ensuring they are level and sturdy. This forms the foundation for the solar panels.
Step 3: Connect Solar Panels
Attach the solar panels to the mounting brackets. Ensure that all panels are oriented in the same direction to maximize sunlight capture.
Step 4: Wiring the Solar Panels
Connect the solar panels to the charge controller using the appropriate gauge of wiring. Follow the manufacturer's instructions to ensure safe connections.
Step 5: Connect Charge Controller to Batteries
Once the solar panels are connected, link the charge controller to the **12V 90AH batteries**. This step is critical for regulating the energy flow.
Step 6: Connect the Inverter
Attach the inverter to the battery to convert DC power to AC power. This setup will enable you to power household appliances.
Step 7: Test the System
After completing the installation, systematically test the system to ensure everything is functioning correctly. Check for any loose connections and rectifications if needed.
Connecting Solar Cells to Your Power System
Understanding how to connect your solar cells to your overall power system is vital to ensuring efficiency and safety. The solar cells should be connected in parallel or series depending on your system's voltage requirements. For a **12V system**, ensure that all connections are tight and that wiring is rated for the expected current.
Testing Your Solar Power System: Ensuring Optimal Performance
Testing your solar system helps identify any issues early. Here are steps to verify your system's performance:
- Check Voltage Levels: Use a multimeter to ensure that the voltage output from the solar panels matches the expected levels.
- Monitor Battery Charge: Make sure the batteries are charging correctly, observing the charge controller readings.
- Evaluate Appliance Performance: Test appliances connected to the inverter to ensure they are running smoothly.
Maintenance Tips for Longevity and Efficiency
Regular maintenance is essential to prolong the life of your solar cells and maximize their efficiency. Here are some tips:
- Clean Solar Panels: Periodically clean the solar panels to remove dirt and debris that can obstruct sunlight.
- Inspect Connections: Regularly check connections and wiring for signs of corrosion or wear.
- Monitor Performance: Keep track of energy output and compare it against expected levels to spot any anomalies.
- Check Battery Health: Maintain battery health by ensuring they are adequately charged and free from sulfation.
Troubleshooting Common Issues with 12V 90AH Solar Cells
Even with proper installation and maintenance, issues can arise. Here are some common problems and their solutions:
- Low Voltage Output: Check connections and ensure the solar panels are not shaded.
- Batteries Not Charging: Ensure the charge controller is functioning correctly and check for blown fuses.
- Inverter Failure: Verify that the inverter is connected correctly and not overloaded with appliances.
Frequently Asked Questions
1. How long do 12V 90AH solar batteries last?
With proper maintenance, 12V 90AH solar batteries can last between 5 to 15 years, depending on the type and usage.
2. Can I connect multiple solar cells together?
Yes, you can connect multiple solar cells in either parallel or series to increase voltage or capacity, respectively.
3. What is the best angle to install solar panels?
For optimum performance, the angle of installation should be approximately equal to your local latitude.
4. How often should I clean my solar panels?
Cleaning your solar panels every 6 months is recommended, or more frequently if you live in a dusty area.
5. What should I do if my solar system isn’t producing enough power?
Check for shading, verify all connections, and ensure that the solar panels are clean and functioning correctly. If issues persist, consult a professional.
Conclusion
Installing and maintaining **12V 90AH solar cells** is a rewarding venture that empowers you to harness renewable energy efficiently. By following this comprehensive guide, you can ensure that your solar power system operates at peak performance while contributing to a sustainable future. Remember to invest time in regular maintenance, monitor performance, and keep abreast of advancements in solar technology. With the right approach, your 12V 90AH solar cells will provide reliable energy for years to come.
Key words:
Sales Team
The company adheres to the working principles of integrity, standardization and efficiency, and wholeheartedly provides high-quality, efficient and fast services to our customers.


SALES:Jack Lee
Wechat: Jack13923713448
Facebook: Jack Lee


SALES:Jason Yu
Wechat: +86-13416655615

Rene battery, excellent performance, drive the future!
Contact Us
Address:Block 2, No.9, Yexing 1st Road, Huicheng, Xinhui District, Jiangmen City, Guangdong ,China

Subscribe to get offers and updates!
Social Media


